Tutorial
Build a tiny order slice: API, database, external payments, and a trust boundary.
Screen map
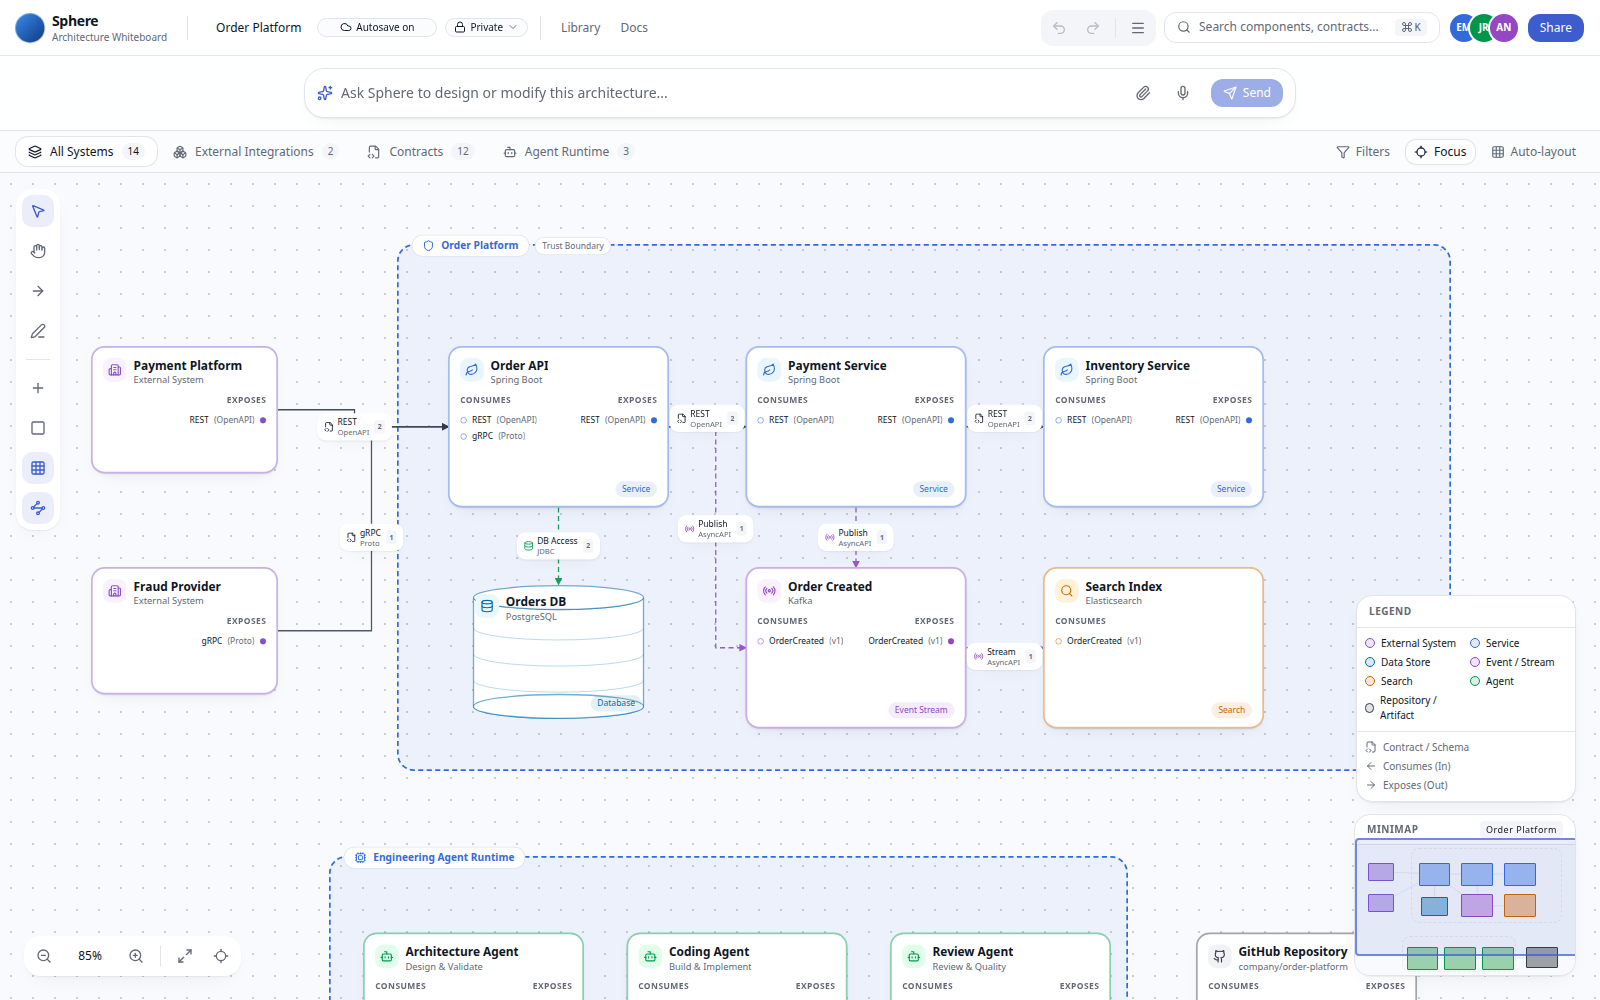
- Top bar — diagram name, Autosave/visibility, Library, Docs, search, undo/redo, Board & export, collaborator avatars (real-time co-editing isn't live yet — see the FAQ), Share.
- Ask Sphere bar — natural-language prompt to design or modify the architecture.
- View tabs — All Systems, External Integrations, Contracts, Agent Runtime, plus Filters / Focus / Auto-layout.
- Tool rail (left) — Select, Pan, Connect, Fast design, Add component, Add boundary, Toggle grid, Curved arrows.
- Canvas — the diagram itself, with a legend and minimap docked to the lower right.
Step 1 — Name the system
Click the diagram name in the top bar (for example Order Platform). That name is used for export filenames and the SCAN system.name.
Step 2 — Add components
Click Add component on the tool rail to open the kind picker:
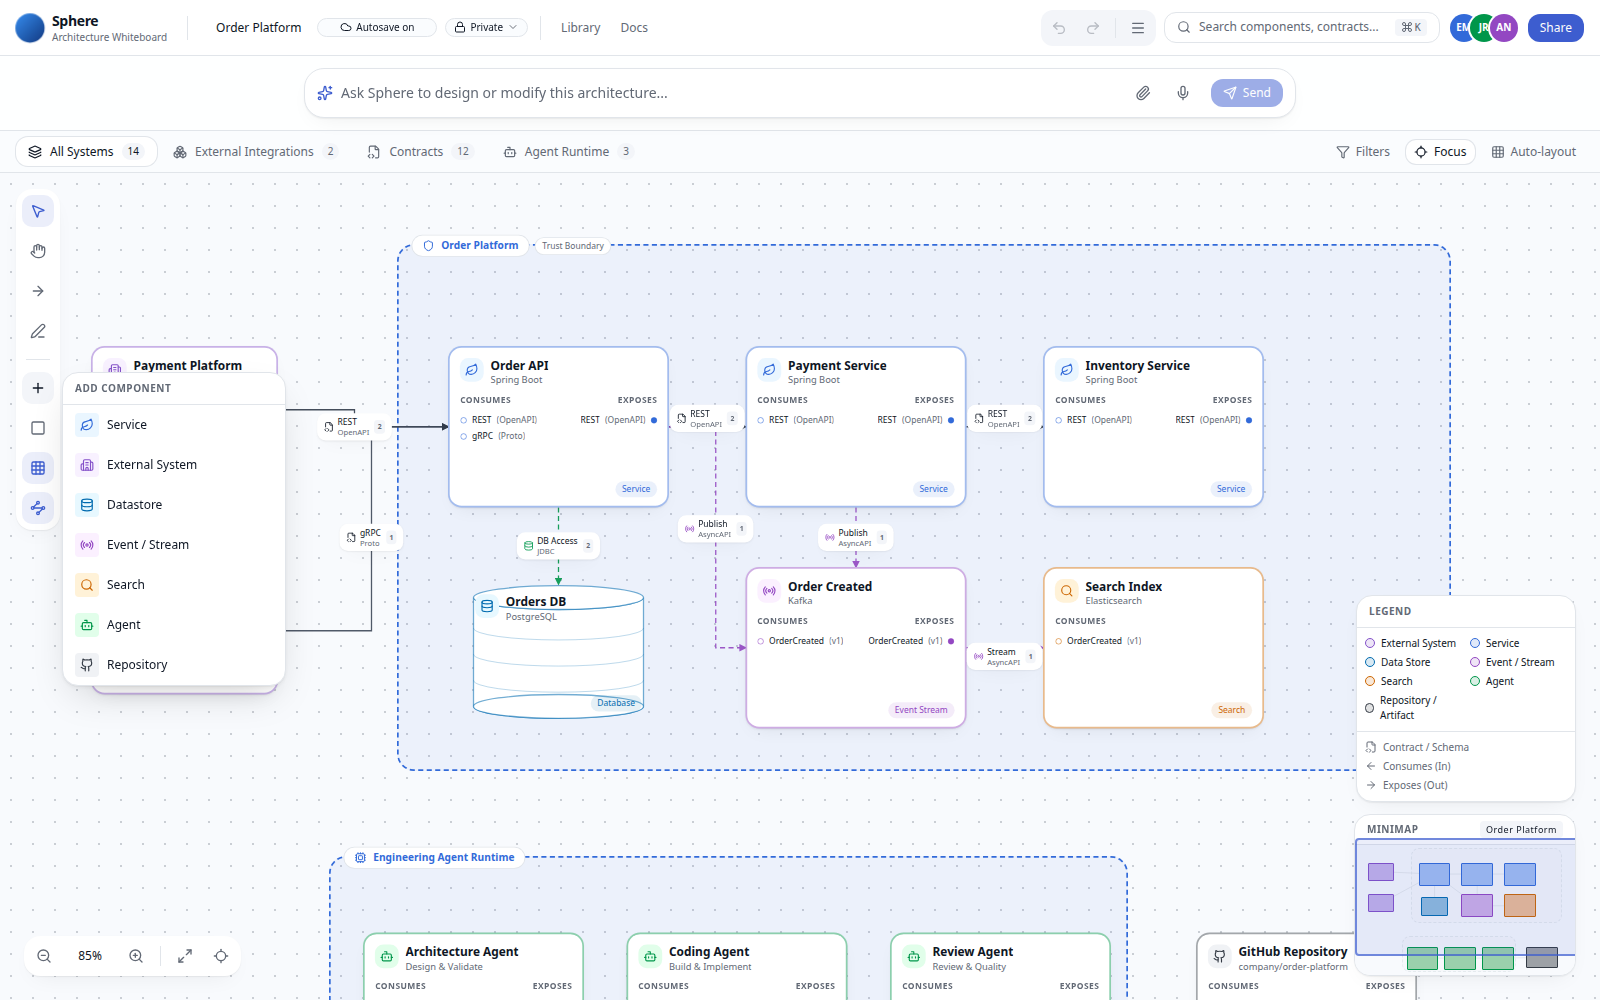
| Kind | Example name |
|---|---|
| Service | Order API |
| External System | Payment Platform |
| Datastore | Orders DB |
| Event / Stream | Order Created |
| Search | Search Index |
| Agent | Architecture Agent |
| Repository | GitHub Repository |
Pick a kind, then click empty canvas to place it. The inspector opens for the new node — set technology (e.g. Spring Boot, PostgreSQL) if you want.
Fast design (optional)
Toggle Fast design on the tool rail. Click to place the current component kind; drag a thin box for a datastore; drag a large box for a boundary; click two components to connect. Esc exits.
Step 3 — Connect
- Select Connect on the tool rail.
- Wire Payment Platform → Order API as a synchronous / REST-style link.
- Wire Order API → Orders DB as database access.
Prefer port-to-port when ports exist: expose → consume.
Select a component to open the Inspector on the right — API Surface (Consume/Expose), Connections, Repository, and Contracts:
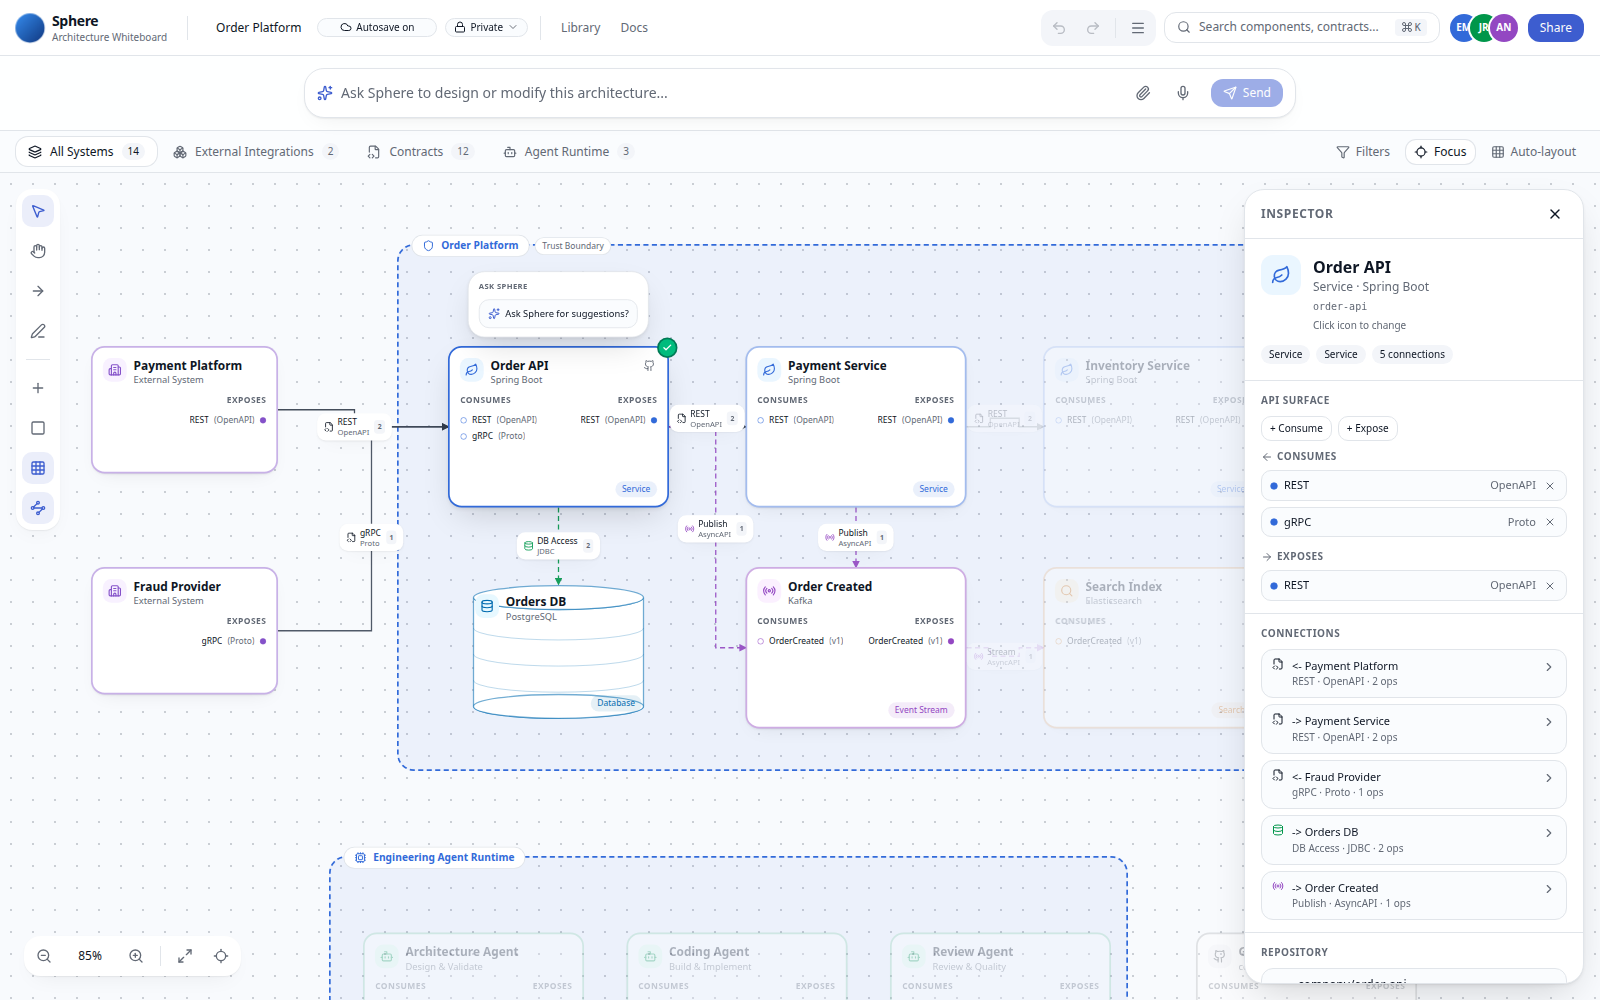
Select an edge to set label, contract (e.g. OpenAPI), and operations from there.
Step 4 — Trust boundary
Add boundary → Trust Boundary, click the canvas, then resize so Order API and Orders DB centers sit inside. Or right-click a component → Group into boundary.
Step 5 — Views and layout
- Tabs: All Systems, External Integrations, Contracts, Agent Runtime emphasize different node kinds.
- Focus dims everything outside the 1-hop neighborhood of the selection.
- Auto-layout rearranges the board, then fits the viewport. Undo with Ctrl/Cmd+Z.
Step 6 — Save and export
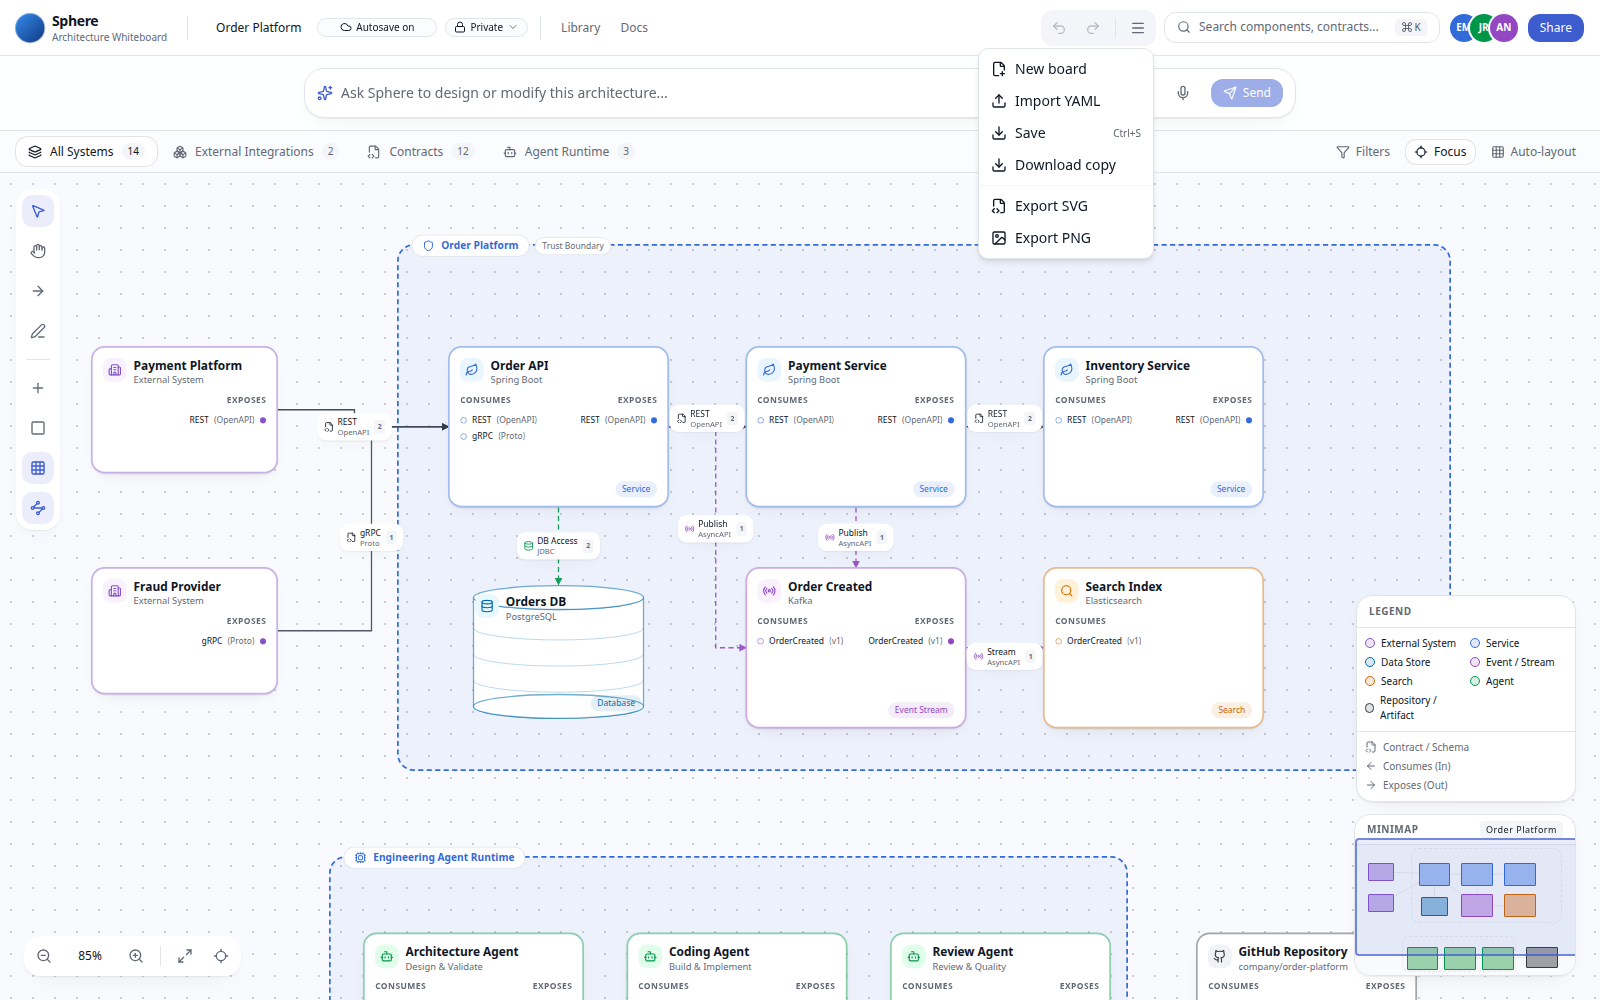
Open Board & export in the top bar for the full menu:
| Action | How |
|---|---|
| Save | Ctrl/Cmd+S or Board & export → Save |
| Download a local copy | Board & export → Download copy (.scan.yaml) |
| Export image | Board & export → Export SVG or Export PNG |
| Import | Board & export → Import YAML |
| Start over | Board & export → New board |
Done
You now have a valid SCAN document Sphere can round-trip. Continue with Ask Sphere or dig into SCAN concepts.